


Blog
Endoscope Angulation Wire Replacement: Diagnosing Lost Deflection and Rebuilding the Control Chain

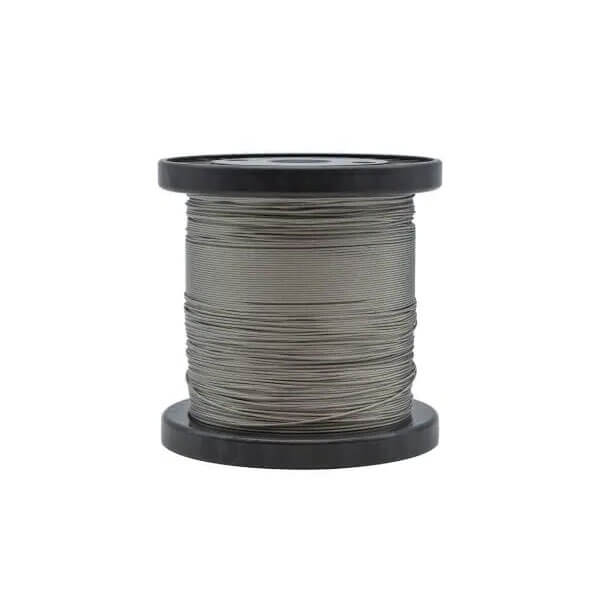
When a flexible endoscope stops holding deflection, the bending section rubber is usually the first suspect and the last thing that actually failed. In most scopes that arrive on a repair bench with “no up angle” or “angle feels soft”, the fault sits one layer deeper: a stretched or broken angulation wire running through a deformed coil pipe, or a worn cam and pulley in the control body that no longer converts knob rotation into wire travel. The practical question for a repair company or a hospital BMET is not what the symptom is called, but which component has to be replaced before the scope can be quoted.

This guide sets out a bench sequence for separating wire failure from articulation failure, the measurements worth recording before parts are ordered, and the acceptance checks that determine whether a rebuilt angulation system can go back into clinical use. It assumes the reader already repairs flexible scopes and needs a repeatable method rather than a general introduction.
What the angulation chain actually contains
A flexible scope’s angulation system has five elements that have to work as one chain: the control knobs and their locking mechanism, the cam or pulley and chain (or gear) inside the control body, the angulation wires, the coil pipes that route and pre-load those wires along the insertion tube, and the articulating bending section itself. Each wire is anchored at the distal end and terminated at the control body. Deflection angle is therefore a function of wire travel, and wire travel is a function of how much of the knob rotation survives the cam, the wire stretch and the friction inside the coil.
That chain structure explains why the same complaint (“angle is weak”) can come from four different components. It also explains why replacing a wire without inspecting the coil pipe usually produces a scope that passes on the bench and returns within weeks: the new wire inherits the friction and pre-load of the old coil.
Five failure patterns and what each one points to
The table below is the triage step. Each row corresponds to a distinct bench symptom and a distinct part to quote. It is deliberately mechanical: it describes what the technician can feel and measure with the scope open, not what the user reported.
| Failure pattern | Bench symptom | First confirmation check | Part normally required |
|---|---|---|---|
| Wire strand break (partial or full) | One direction dead or abruptly limited; knob turns with little or no resistance in that direction | Detach wire at control body and pull gently; travel stops or feels “notchy” | Angulation wire assembly; coil pipe if the break scored it |
| Wire fatigue or stretch | Reduced deflection in two or four directions; tip drifts back after the knob is released | Measure maximum deflection per direction against the service manual value; compare lost motion at the knob | Wire set plus tension hardware |
| Coil pipe deformation | Ratcheting or grinding feel in one plane, angle loss that worsens as the insertion tube bends | Run a finger along the insertion tube for flat spots; borescope or light-transmission check of the coil | Coil pipe set, wire assembly |
| Cam, pulley or chain wear | Dead band at the knob; left and right angles differ with identical wire condition | Observe cam/pulley travel with the control body open; check for chain slack and flattened pulley grooves | Cam, pulley or chain; occasionally the whole control body sub-assembly |
| Articulation binding | Stiff or hard knob, angle limit reached early, sometimes a failed leak test | Free the wires, then articulate the bending section by hand: binding here is a bending section fault, not a wire fault | Bending section, vertebrae, bending rubber |
Published repair data supports treating the angulation chain as a wear item rather than an occasional failure. In an independent analysis of 341 Olympus flexible ureteroscope repairs, the deflection apparatus accounted for 14% of all repairs, second only to the distal segment at 30% (Canales et al., Urology 2007). A separate single-centre series of 478 ureteroscope reprocessing cycles recorded seven repairs, two of them for loss of deflection, at an average of 28.1 uses between repairs and a cost of USD 120.63 per use (Semins et al., J Endourol 2009).
Step 1: leak test and document before anything is opened
Leak testing first is not administrative. A scope that fails the leak test has fluid inside the insertion tube or control body, and any angulation work done before that is discovered will be repeated. Test to the conditions in ISO 8600-7:2012: pressurise to at least 20 kPa, immerse for at least one minute, and keep the water between 10 °C and 40 °C. Record pass or fail, the pressure held, and the location of any bubbles. The detailed bubble-localisation method is covered in our leak test failure guide.
A scope that fails the leak test is not automatically an angulation case. Fluid invasion corrodes and binds the wire and coil, so a leak can be the cause of the deflection loss rather than a separate finding, and both faults have to be quoted. If the leak is at the bending section, assume the bending section and the adjacent coil section are both contaminated until inspection proves otherwise.
Step 2: separate the wire chain from the articulation
With the control body housing opened and the wires relieved of tension, the bending section should articulate smoothly and without load when moved by hand. That single test divides the diagnosis in two:
- Free articulation, weak deflection: the fault is upstream — wire, coil pipe, cam, pulley or chain. Continue with the wire travel measurements below.
- Binding or notchy articulation: the fault is in the bending section — deformed vertebrae, a cracked or swollen bending rubber, dried lubricant, or debris between the segments. Replacing wires on this scope will not restore the angle.
At the same stage, inspect the wire itself where it is visible at both terminations. Frayed strands, a bright neck where the wire has been running against a coil break, or corrosion staining are all evidence that the wire and the coil have to be replaced together. A wire that is intact but has lost its pre-load will show slack that cannot be removed by the tension adjuster alone.
Step 3: measure deflection instead of describing it
“Angle is down about half” is not a specification. Before quoting, measure four things on a straight scope at room temperature, with the bending section unsupported, and record them on the work order. The reference for the pass value is the service manual for that model, not a generic number taken from another scope family.
| Measurement | Method | Record as | Reference value |
|---|---|---|---|
| Maximum deflection, up / down / left / right | Protractor or printed angle scale aligned to the distal tip at rest; knob turned to the stop | Degrees per direction | Model-specific value in the OEM service manual |
| Left / right symmetry | Same setup, both directions | Difference in degrees | Any visible asymmetry is a finding; quantify it rather than judging by feel |
| Lost motion at the knob | Mark knob position, turn until the tip first moves | Degrees of knob rotation before tip movement | Dead band indicates slack, stretch or cam wear |
| Tip drift after release | Release the knob from full deflection, observe the tip | Millimetres or degrees of spring-back | Drift means the wire is no longer holding tension |
| Wire pull at the control body | Spring scale on the wire end, compare with the opposite wire in the same scope | Newtons | Compare within the scope; a large difference indicates one stretched wire |
The dimensional requirements that sit behind these measurements — insertion portion dimensions, deflection and terminology — are defined for endoscopes generally in ISO 8600-1:2025, but the acceptance figures a repair shop works to come from the model-specific service documentation. Where that documentation is unavailable, record the as-found and as-left values and state the reference used.
Step 4: quote the assembly, not just the wire
The most common sourcing error in angulation repair is ordering a wire for a scope whose coil pipe is already deformed. The wire is a consumable under tension; the coil is the track it runs in. A kinked or crushed coil increases friction and changes the effective length of the wire path, so a new wire is either over-tensioned to reach the same angle or under-tensioned and unable to hold it. Both outcomes shorten the life of the repair.
When the RFQ goes out, send the model, the serial number, the failed direction, the measured angles before failure if available, and photographs of the wire termination and the coil at the point of damage. Suppliers who stock compatible assemblies for Olympus, Pentax and Fujinon scopes can then match wire diameter, strand construction, overall length and end fitting rather than sending a “close” part that has to be modified on the bench.
| Damage pattern | Parts to quote | Data to include in the RFQ |
|---|---|---|
| Single direction dead, wire broken | Wire assembly; coil pipe if scored; bending rubber if removed | Model, serial, failed direction, photo of broken end, insertion tube length |
| Reduced deflection in all directions | Wire set, tension hardware, coil pipe set if friction is high | Measured angles per direction, lost motion, previous repair history |
| Ratcheting or grinding feel | Coil pipe set, wire assembly | Location of the noise along the insertion tube, borescope image if available |
| Dead band at the knob, uneven L/R | Cam, pulley or chain; wire set | Control body photographs, model variant (knob type, lock type) |
| Hard articulation, angle limited early | Bending section, vertebrae, bending rubber | Leak test result, hand-articulation finding with wires free |
Step 5: rebuild sequence that holds tension
The order of assembly matters more than the speed of it. A workable sequence for a two-wire or four-wire chain:
- Anchor the distal ends first, with the bending section straight and the coil pipes fully seated.
- Route each wire through its own coil without crossing, and confirm the coil ends sit flush at both the bending section and the control body.
- Set pre-load with the scope straight, never coiled. Tensioning a coiled scope produces a setting that changes the moment the insertion tube is straightened.
- Cycle the angulation 20 to 30 times through the full range, then re-check tension. New wires bed in and lose a small amount of pre-load in the first cycles.
- Assemble the control body, confirm the lock mechanism engages at full deflection, and re-measure all four directions against the baseline record.
- Leak test again after assembly, then check image, light and channel function.
Where the control body uses a chain and pulley rather than direct cam actuation, check chain slack before closing. A chain that has jumped a tooth will produce exactly the symptom the customer reported, and it will do so again after a wire replacement if the chain is not corrected.
Step 6: acceptance checks before the scope leaves the bench
A rebuilt angulation system passes when the following are documented on the work order, not when the technician is satisfied with the feel:
- Leak test pass at the ISO 8600-7 conditions, with pressure and hold time recorded.
- Deflection in all directions at or above the model’s service-manual value, with left/right symmetry within the tolerance stated in that documentation.
- No tip drift after release; lock mechanism holds at full deflection without slipping.
- Knob effort smooth through the full range, with no notch, click or ratcheting at any insertion tube position, including a gentle S-bend.
- Image unchanged: no new black dots, no new fibre loss, light output comparable to the as-found record.
- Air/water and suction function verified, channel patency confirmed, and the biopsy channel inspected if a wire was replaced near it.
Items on that list map to failures that recur in the field. In a four-year review of 4,280 pediatric flexible bronchoscope reprocessing cycles, 29 failures were recorded (0.678%) at an average repair cost of USD 7,246.60, with dim images, black dots and improper image display during angulation adjustment among the common modes (Hu et al., BMC Pediatrics 2024). The image check after an angulation repair is not a formality: it is the same check that catches a fibre bundle damaged during disassembly.
Why rebuilt angulation systems come back
Three causes account for most repeat work. The first is reusing a coil pipe that was already deformed. The second is tensioning with the insertion tube coiled, which produces a setting that is wrong in use. The third is handling after the repair: over-deflection with an instrument in the working channel, tight coiling during storage, and reprocessing without a leak test.
The handling factor is documented. Extreme deflection with an indwelling instrument was one of the two leading causes of flexible ureteroscope damage in a manufacturer-data analysis covering four major brands, alongside working channel damage from laser burn and instrument passage (Sung et al., J Endourol 2005). The same review found that repair frequency rose as scope diameter decreased and length increased, which is why small-diameter scopes justify a stricter handling policy rather than a longer warranty argument.
Reprocessing discipline matters as well. In the pediatric bronchoscope series above, the failure rate was 75.9% in scopes reprocessed by staff with less work experience, a finding the authors used to argue for workflow and training changes rather than more repair capacity. For a repair company, that is a service conversation worth having with hospital customers: a short handling and inspection briefing reduces the repair frequency that generates the invoices.
Stocking the parts that actually fail
Angulation parts are slow-moving individually and fast-moving in aggregate. A workable stocking rule for a repair shop is to hold wire and coil assemblies for the model families that appear most often on the bench, and to hold control-body wear parts only where the shop performs control body overhauls rather than exchanging the assembly. Track two numbers per model: repairs per year and the share of those repairs that needed a coil pipe as well as a wire. The second number tells you whether the wire-only stock level is realistic.
For shops building out a bench, the tooling side is covered in our repair bench tool and test equipment checklist, and compatible wire and coil assemblies are listed in the flexible endoscope parts range. Technicians who are moving from parts replacement to full angulation rebuilds usually need the disassembly and tensioning practice that a structured course provides; our endoscope repair training covers the sequence on live scopes.
Questions that come up before an order
Can a single broken wire be replaced on its own?
Mechanically yes, and it is often done on four-wire scopes where only one direction failed. It is a poor decision when the remaining wires show the same age and the coil pipe has been scored by the broken end. In that situation the second failure usually follows within a few months, and the customer experiences it as a failed repair rather than a second wear event.
Is lost deflection always a wire problem?
No. Roughly half the scopes that arrive with the complaint have a binding bending section, a worn cam or a stretched wire with an intact coil. The hand-articulation test with the wires relieved is the fastest way to find out which one you have, and it takes less time than opening a parts order.
How long should a rebuilt angulation system last?
There is no defensible single figure. Service life depends on the model, the number of procedures, the deflection range used in those procedures, storage practice and whether the scope passes a leak test after every case. Published series report averages of about 28 uses between repairs in high-turnover ureteroscope programmes, but those figures describe a specific reprocessing and handling regime and should not be quoted to a customer as a warranty expectation.
What to send with the quote
A defensible angulation repair quote carries five things: the measured deflection record before disassembly, the hand-articulation finding, the photographs of the wire and coil at the failure point, the parts selected with the reason for each, and the acceptance values the scope will be tested against. That package does two jobs — it justifies the price to a procurement officer, and it protects the repair company when a scope returns with a complaint that turns out to be a handling issue. Compatible assemblies, coil pipes and control-body wear parts for Olympus, Pentax and Fujinon scopes are available through the flexible endoscope parts catalogue; send the model and measurement record through the RFQ form and the part match can be confirmed before the scope is opened.